

Everyone talks about optimizing their mixes and the techniques used to shape their workflow, but far less attention is given to the preparation that happens before the mixing stage even begins. Many engineers dive straight into EQ, compression, and automation, only to end up with a mix that still sounds muddy, noisy, or just plain off. Adding more plugins rarely solves the problem. In fact, adding more plugins likely makes things worse. More often than not, the missing piece is proper gain staging.
Chris Lord-Alge, a Grammy-winning mix engineer, has notoriously emphasized how important it is to set up proper signal levels before any mix processing. If you think about it this way, the better you prepare your session by using appropriate gain staging, the less you have to mix later. Much easier, right?
Balancing the gain levels on all tracks before you apply any EQ, compression, and other effects will save you time and money, especially considering how expensive recording studios can get. All the great mixing engineers even admit that they focus on getting even sound levels before they start to mix, and it’s no secret to see how that could give one the greater advantage. Less moves, less stress, greater clarity, better results!
What Is Gain Staging?
So, what exactly is gain staging? Gain staging is the process of setting your audio levels at each step of the signal chain, so the sound is strong and clear without being so loud that it causes distortion. Gain staging audio just means managing volume at each point in your signal chain, so your levels stay balanced and consistent from the moment a signal enters your system. It's efficiency in the most direct form. Good gain staging is one of the simplest and best habits that’ll help you become a better mixing engineer and make every decision that much easier.
When I first started mixing, I usually skipped it since I was recording different instruments at different times. It’s one of the traps that many folks get caught in, especially if they record at home. I was naïve to think that I could make up for any faults later in my process.
But there will come a point, if you haven’t already noticed, where you realize that every piece of gear and every plugin in your chain is designed to work best within a certain input range. Hand it a signal that's too hot, and it reacts fairly unpredictably. If you send it something too weak, you'll pick up unwanted noise along the way. We’ll get into what to look for and how you can close the gap, so that you won’t need to rely on purely your ears.
Each "stage," whether it's a preamp, a fader, or a plugin, needs to receive a clean, appropriately leveled signal to do its job properly. Skip this step and you'll run into some clipping, a noisy noise floor, and plugins that behave inconsistently because they're not getting the signal level they expect. Gain staging will keep your levels consistent, so every tool in your chain works the way it's supposed to.
Gain Staging with Analog Gear
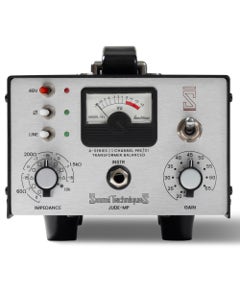
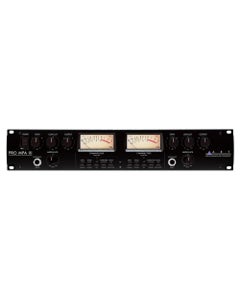
Analog equipment, including preamps, consoles, and outboard compressors, tends to sound and perform its best when driven at a particular signal level. This "sweet spot" is often rooted in how the transformers and analog circuits inside the gear react to incoming audio, shaping the tone, depth, and character of the sound.
If you push an analog signal too hard, then you'll often get this warm, saturated effect on the signal. Sometimes that could be a problem. Often times it's exactly that warm, thick character you're going after! Audio nerds know what I’m talking about.
Analog gear is generally more forgiving than digital systems, which is one reason many engineers continue to rely on it today. Still, running signals too low can create noise floor problems that are difficult to fix later. If the level drops far enough, the hiss and self-noise of the equipment can become more noticeable than what you're trying to record.
A pretty simple way to check if you’re staying in the right zone is to watch your VU meters. Aim for a signal that hovers around 0 VU. That generally gives you a clean, balanced level that leaves room for the natural give and take of analog gear without getting any unwanted noise or harsh distortion.
Gain Staging with Fixed-Point Digital Interfaces
Fixed-point digital systems, like many audio interfaces, handle headroom very differently than analog gear does.
The biggest difference is how each system responds to pushing levels too far. Analog gear tends to saturate gradually, often in a way that can sound musical. Digital clipping, on the other hand, is nowhere near as forgiving. Oh, and you’ll definitely know! Once you hit 0 dBFS (decibels full scale) in a fixed-point digital system, you get this harsh, brittle distortion sound that sounds like someone’s scratching their fingers on a chalkboard. It’s very different from the fluffy, pillowy, warmth you get from analog gear. No hate towards my digital peeps; it’s just the nature of it all.
That's why it really pays to leave yourself some breathing room. A good rule of thumb is tracking with peaks sitting between -18 dBFS and -12 dBFS. This leaves plenty of headroom for EQ, compression, and other processing later without putting you anywhere near that cold, unforgiving digital ceiling.
Common Parameters for Gain Staging
Here are a handful of key parameters that deserve your attention and are worth getting to know while you get the gain staging set in your session:
- Input gain/trim: This is the first checkpoint for keeping your signal in a healthy range before it hits anything else.
- Fader levels: Your main volume control within the mix itself, used to balance tracks relative to one another.
- Plugin input/output levels: Many plugins have their own internal gain stages, and mismatched levels here can cause unexpected volume jumps.
- Headroom before the master bus: The cumulative level of all your tracks combined needs room to breathe before hitting your master channel.
By keeping these levels consistent across your session, you eliminate the chaos that can creep into the mixing process. Rather than fighting unexpected level changes every time you insert a new plugin, you create a controlled environment where your processing behaves predictably, and your mix decisions become faster, easier, and more effective.
How to Gain Stage Your Mix: A Step-by-Step Approach
Now that we’ve talked about why gain staging is important and how it affects analog and digital interfaces differently, let’s get into how we can practically put this into use.
Here's a quick checklist that you can run through on your next project:
- Set a consistent reference level for all tracks before you start mixing. This gives you a stable starting point to build from.
- Check each track's input gain so peaks sit comfortably below clipping, leaving room for processing later.
- Match plugin input and output levels so you don't get unexpected jumps in volume as a signal moves through your chain.
- Leave headroom on the master bus, typically around -6 dB, so there's room left for mastering.
- Monitor levels continuously as you add plugins, automation, and effects throughout the mixing process.
Run through this checklist at the start of a session, and keep revisiting it as you move along will help keep your mix clean and consistent from beginning to end.
Start Gain Staging in Your Mix Today
Gain staging is the foundation that everything else in your mix is built on. A mix built on solid gain staging is optimal and gives every plugin, every fader move, and every creative decision a fair shot at actually working its way into your mix, like how it’s meant to.
Try running through the checklist above on your next session. Pay attention to how much more balanced your mix sounds and how much more headroom you have to work with once your levels are all dialed in from the start.
Once gain staging becomes second nature, then you can dig into all of the other mix optimization techniques, like bus compression, parallel processing, and frequency balancing, to keep building on that solid foundation. And to be honest, you’ll have a much better foundation and way to measure your improvement when it comes to mixing. Without the proper foundation, it’s wherever the wind blows.



Gain Staging: Frequently Asked Questions
What happens if you skip gain staging?
Skipping gain staging often leads to clipping, excess noise, and plugins that respond unpredictably since they're not receiving the signal level they're designed for. It can also make your entire mixing process feel more chaotic, since every new track or plugin throws your levels off balance.
Is gain staging different for analog and digital gear?
Yes, analog gear tends to be more forgiving when pushed too hard, often producing a warm saturation. Digital systems are far less forgiving, since hitting 0 dBFS causes hard, unwanted clipping. Choose a VU-based approach around 0 VU for analog gear and keep digital peaks between -18 dBFS and -12 dBFS.
What's a good headroom target for the master bus?
Leaving around -6 dB of headroom on your master bus is a solid target. This gives mastering engineers, or yourself if you're mastering the track, enough room to work without running into clipping.
How often should I check my gain staging during a mix?
Continuously, levels can shift every time you add a plugin, automate a fader, or bring in a new track, so it's worth monitoring your gain staging throughout the entire mixing process, not just at the start.
Do I need expensive gear to practice good gain staging?
No, gain staging is a practice that doesn’t rely on the quality of the gear being used. It's just as relevant in a home studio with a basic audio interface as it’s on a professional analog console.